

a. Begin on your accounts home page, once you have signed up and logged in.
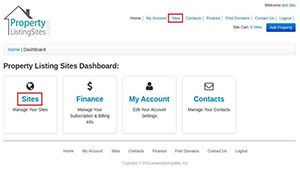
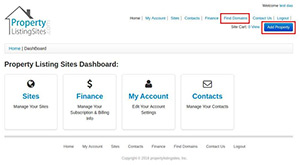
b. Click "Sites" to view your Dashboard. From there, click "Add property" or "Find Domain". These direct you to our Domain Registry.
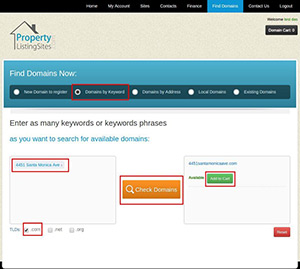
c. Select "Find domains by keyword" listed in the options below the title "find domains now:". Type your chosen domain name, and select your chosen TDLs (.com, .net, or .org), then click "Check Availability". Once an available domain has been found, click "Add to cart" and "Proceed".
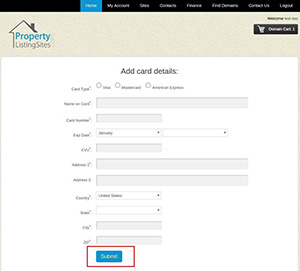
d. Add card details, and click "submit" to continue.
e. Confirm your purchase by checking the applicable boxes, reading and agreeing to the Terms and Conditions, then clicking "Make Payment".
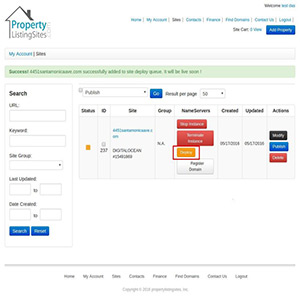
f. Click "Go to Dashboard". Once you had been directed to your Dashboard, click "deploy", within the column "NameServers".
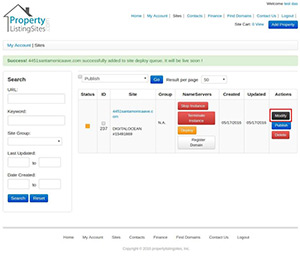
a. Beginning from your Dashboard, click "Modify", found under the "actions" column of the chosen site.
b. "Modify" directs you to "Details", here you can select a template by clicking the drop down menu and viewing demos to find the perfect template.
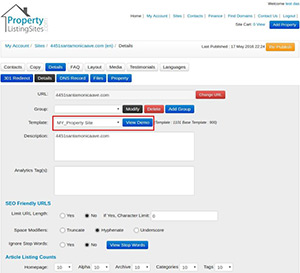
c. In most circumstances no further changes need to made within "Details", so to update changes, click "Update" at the bottom of the page.
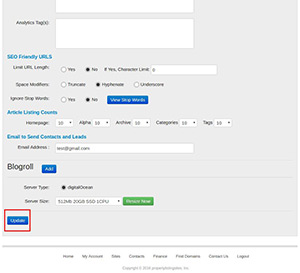
a. Beginning from your dashboard, click "modify", then "Property", directing you to the "Property Details" page. From here, you can modify the information displayed on the home page of your Property Listing Site.
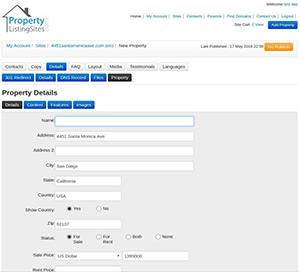
b. Fill in the appropriate information within the applicable blank text boxes. Boxes left blank or unfilled will not show up on your property listing site. Note, when filling in the "For Sale Price" only include numbers, leave out any further characters. This includes dollar signs, commas, periods and spaces. For example, 799000 will automatically be shown on your site as $799,000 USD. To update changes, click "update" at the bottom of the page.
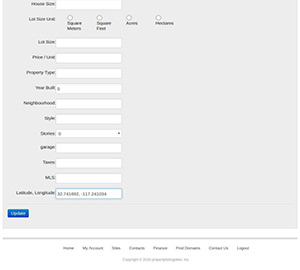
c. To include a Google map featuring the exact location of your listing, fill in the latitude and Longitude text box, including a comma, space, and dash in between. Note, you can find this information at websites such as www.latlong.com. For Example, 32.741692, -117.241034
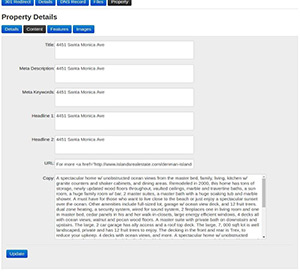
d. Click "Content" and fill in the applicable text boxes. It is recommended that you write the property address under Title, Meta Description, Meta Keyword, Headline 1 and 2. Write a written description of the property listing under the "Copy" text area. This will be the written content on the Property Listing Sites home page. Under "URL", you can embed a link to another website using source code. For example, "For more <a href="http://www.islandsrealestate.com/denman-island-homes-above-500000?city=denman island&type=home&price=>500000">Denman Island Listings</a> go to <a href="http://islandsrealestate.com">islandsrealestate.com</a>" Always remember to click "update" to save changes.
e. To add images to the home page, click "Images" within the property details. Click "Add New Image".
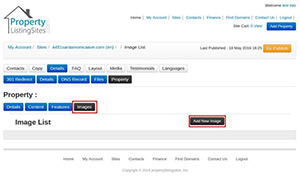
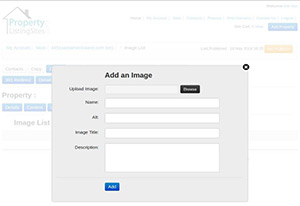
f. Upload one image at a time, filling in the applicable text boxes, and selecting "Add" to save.
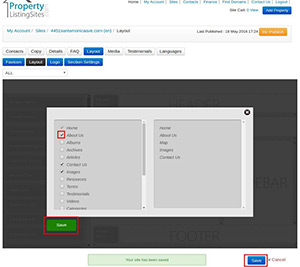
a. Begin by clicking "Layout", this directs you to the template layout editor. Here you can add the pages you wish to include to you header and footer menus by clicking the boxes reading "Header Menu" and "Footer Menu", then checking off the boxes of the pages you wish to include. Check the boxes in the order you wish them to be listed. Click save, on both the header and footer, then again below the layout frame.
a. Begin be designing and creating a logo that is the appropriate pixel size to fit your chosen template. By clicking "logo" and resting your curser over the default logo in the green box, it will show you the correct pixel size. For example 185px x 29px.
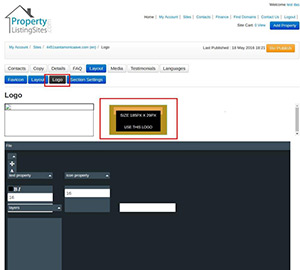
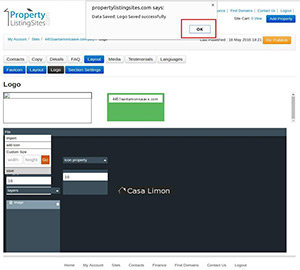
b. Click "file", select "Import" in the drop down select menu. Upload your logo image, and click "Use Original", then "Save", also found in the drop down menu select.
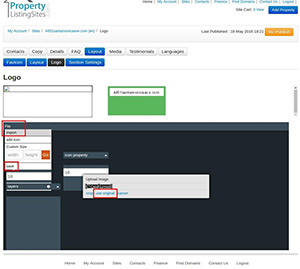
c. A second "save" pop up window will appear, make sure to click "save", then "refresh" on your web browswer to see the changes made.
a. A favicon is an icon associated with a URL that is variously displayed, in a browsers address bar or next to the site name is a bookmark list, etc. Usually 16px x 16px in size and used as an important overall online branding strastrategy
b. Begin by designing and creating your personal, apprappropriately sized favicon, if you haven't already done so.
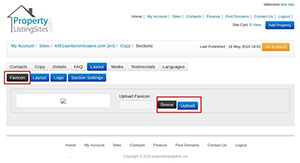
c. Starting in "Layout", click "Favicon", then "Browse", and "Upload".
a. Begin by clicking "Media", then "Add Album" and fill in the applicatbletext boxes. Upload an image to be displayed as a thumbnail on the album. If you only create one album, each image will display individually on your "Images" page of your Property Listing Site. If you create more than one album, they will display as a row of albums with a single, selected thumbnail image on each. Clicking on the album will open it within the same window, and display the page of images, including titles and descriptions. Clicking the photo will open a pop-up window with the image enlarged.
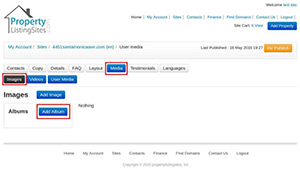
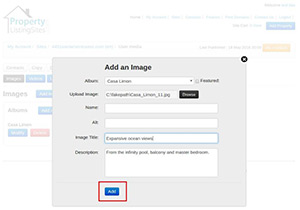
b. Add images to your album by clicking "Add Image", selecting an album from the drop down menu select, uploading the image and writing a title and description in the text boxes labeled "Title" and "Description". Complete the process and save by clicking "Add". Images will automatically uploaded to the Images page of your Property Listing Site.
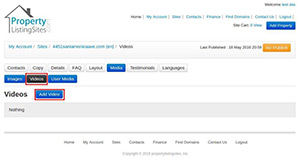
a. To add a video, click "Videos" within "Media".
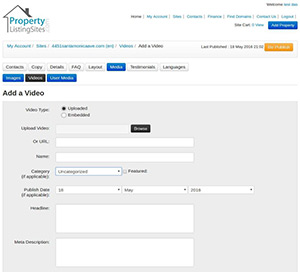
b. If you are uploading a video file from your computer, check "uploaded", and click "browse" to choose the video file. Fill in the applicable text boxes, selects and click "Add".
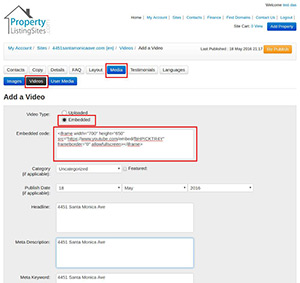
c. If you want to use a video from a site like Youtube, right click on the video and click "Copy Embedded Code". Then paste the code into the "embedded code" text area. Fill in the applicable text boxes, selects and click "Add".
d. Videos will automatically appear on the "Videos" section of your Property Listing Site once changes have been saved.
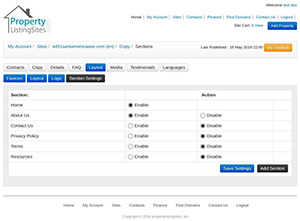
a. To add a section, click "Layout", then "Section Settings". Check "Enable" on the section you wish to add. Then click "Save Sections". If the section you wish to add is not in the existing list of sections, click "Add Sections", fill in the text boxes and click "Add".
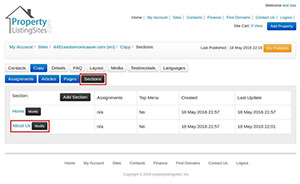
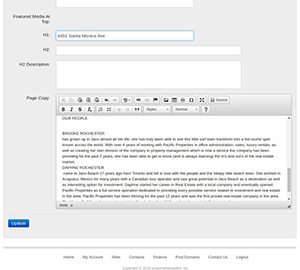
b. To modify and add copy to the section, click "modify". Fill in the text boxes, add copy and click "Update".
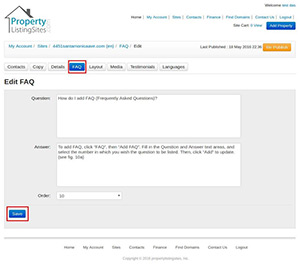
a. To add FAQ, click "FAQ", then "Add FAQ". Fill in the Question and Answer text areas, and select the number in which you wish the question to be listed. Then, click "Add" to update.
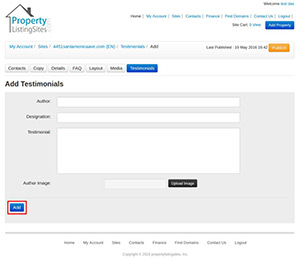
a. To add Testimonials, click "testimonials", then "Add Testimonial". Fill in the text areas, upload and author image, and click "Add".
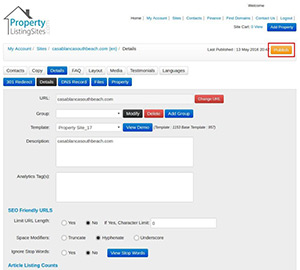
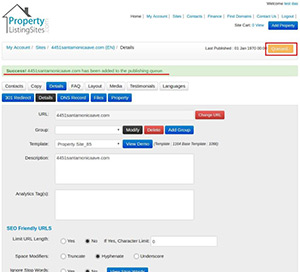
a. When you have saved and updated your changes and you are ready to publish your site, click "Publish", found on the upper right hand side of the page.
It is an easy, accessible way for a customer to gain access to that listing. A business card is easy for a potential customer to lose. They only have to open their bag on a windy day, and poof! It's never to be seen again...that is, if they even accepted your business card in the first place. A website, however, is more convenient: potential customers can write down the site name, or even store it on their phones.
Opening a link online takes much less work than calling/e-mailing a realtor to for a quote. The information is already there, easily accessible at one’s fingertips.
Imagine that potential customer who goes out of their way to visit an open house or meet with a realtor...only to find that they hate the house’s architecture.
A website for your listings can clear this problem away easily: all they have to do is click the link to see the images. They don't even need to speak to you in person.
Also, websites work on many platforms: potential customers can access your website on their PCs, tablet computers, phones or music players. This makes websites an ideal advertising option in today’s high-technology world.
Our dozens of SEO optimized templates for each listing grant you more visibility as a real estate agent. Potential customers will be able to look you up and see all the listings you have on offer, all at once. Seeing all your listings in one place seems much more impressive than other, geographically dispersed scattered markers or advertisements realtors use: the signs in front of the houses they're selling, their logo branded onto park benches and buses…. With website listings, however, that same person can look up all your different listings. They'll see a listing they might not have seen otherwise and recommend it to a friend…the next thing you know, you've got another sale. Moreover, if you include a tool on your website to capture analytics, you can see which houses web visitors are more interested in—and modify your advertising accordingly.
With a website, it's easy for a potential customer to copy a link and send it off her great-aunt Gertrude. More importantly, with a website, you can easily add an SEO capability, so that your listings will pop up right away in Google searches.
In addition, you can include and "like" and "share" capabilities for Facebook, Twitter, Pinterest and Instagram on your websites. Through word of mouth, anything can go viral these days—a cute dog, a delicious-looking cake, and yes, even a beautiful home. By allowing users to interact with your listings in this way, they'll develop a connection to your brand. As such, they'll be more inclined to remember your name the next time they're looking to buy a house.
As a busy real estate agent, you might not have the time to design a plethora of websites. In that case, you might want to consider using our services.
We are well-equipped to help you with all your web design needs. We know exactly what to do (or what not to do) when designing a website, and we’re aware of all the latest trends.